General / cameraCMS / Device Configuration
cameraCMS Configuration Steps
📢 Applicable Model: RGB20X-NAI-GY Educational Tracking Camera (order codes: 981-0011-21-0).
After downloading the software, double-click the application icon to launch CameraCMS.
Find Your Device
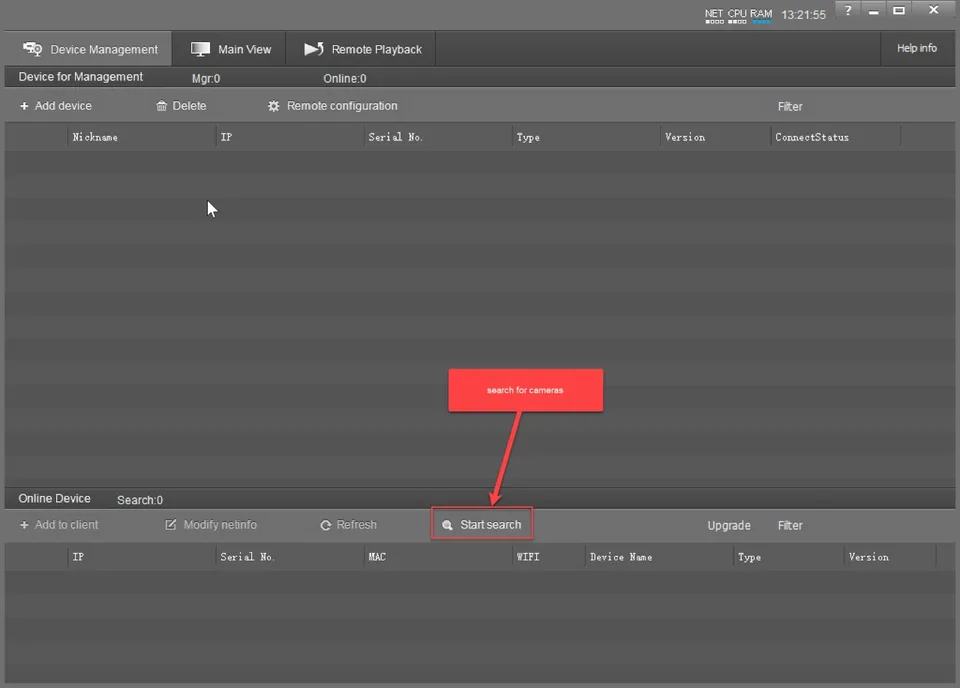
In the main interface, open Device Management page.
Step 1: Search for Cameras
-
Click Start Search and wait for the software to detect the camera.
The detected device will appear in the search results.
-
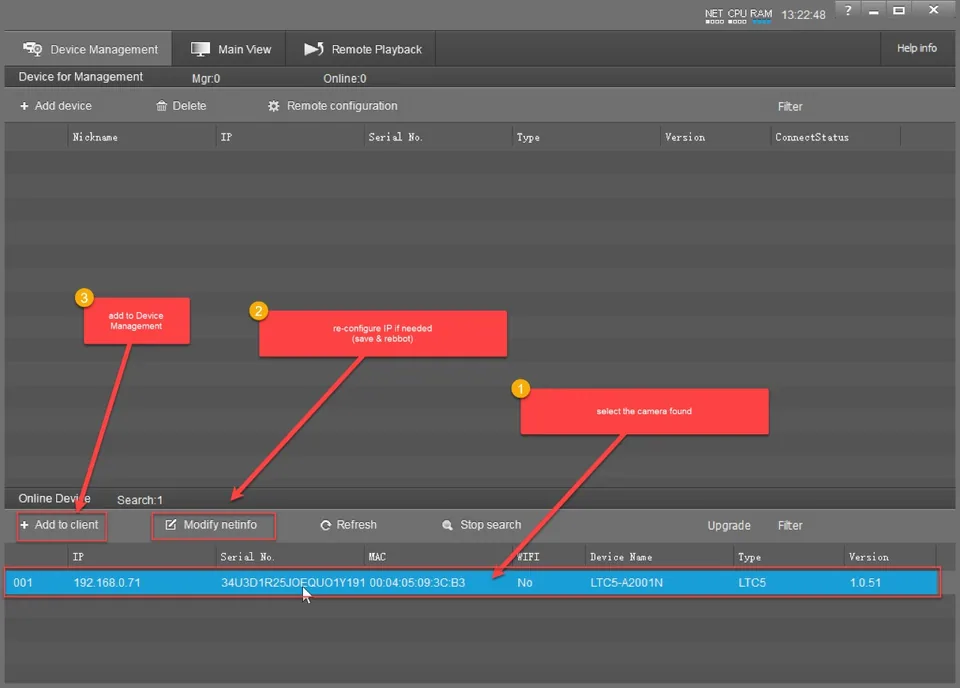
Select the detected camera and click Modify netinfo to reconfigure its IP settings if necessary.
Save the changes and reboot the camera if the IP settings are modified.
Step 2: Add the Cameras
-
Click Add to client to add the camera to Device Management.
-
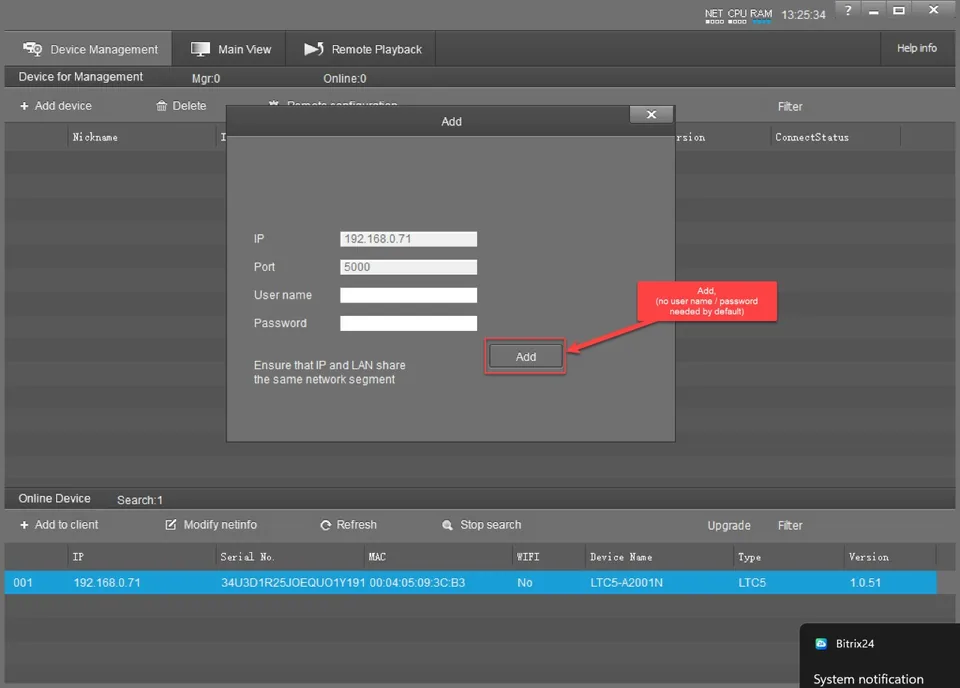
In the Add pop-up window, ensure that the camera's IP address and the LAN configuration are on the same network segment.
-
Click Add to confirm. The camera will then appear in the Device Management list.
📢 Notes: No username or password is required by default.
-
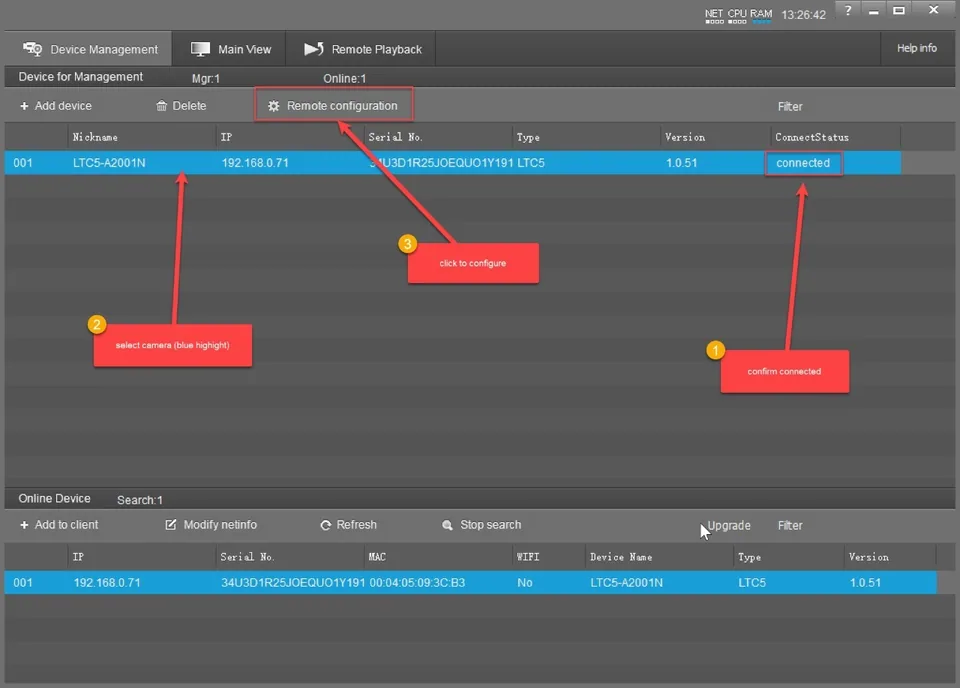
In the Device Management list, select the camera and confirm that it is highlighted in blue and its status is Connected.
-
Click Remote configuration to proceed to the next step.
Remote Configuration
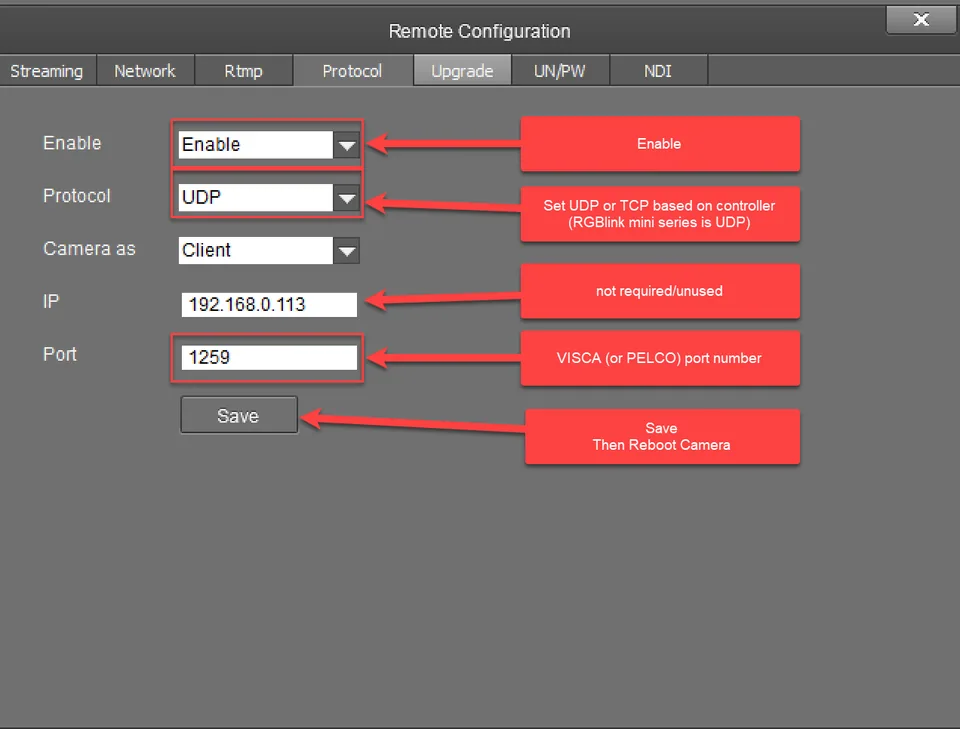
In the Remote configuration window, open the Protocol tab and configure the following settings:
-
Enable: Select Enable to activate the protocol.
-
Protocol: Select UDP or TCP according to the camera controller's requirements.
📢 Notes: Use UDP with RGBlink mini-series devices.
-
Camera as: Leave the setting at Client by default.
-
Ip: No configuration is required for this field.
-
Port: Enter the port number configured for VISCA or PELCO, as applicable.
The default VISCA port is
1259.
📢  Notes: Do not use the following ports, as they are reserved by the camera's internal services:
5000, 5002, 554, 80, 88, 8080, and 9005.
- Click Save then rebot the camera to apply the settings.
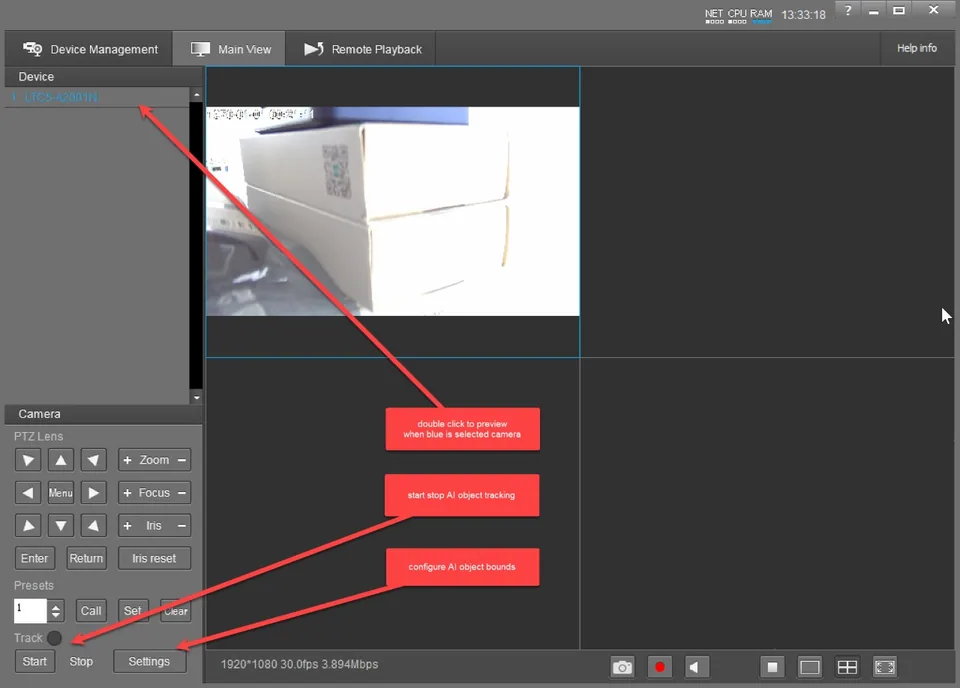
Main View
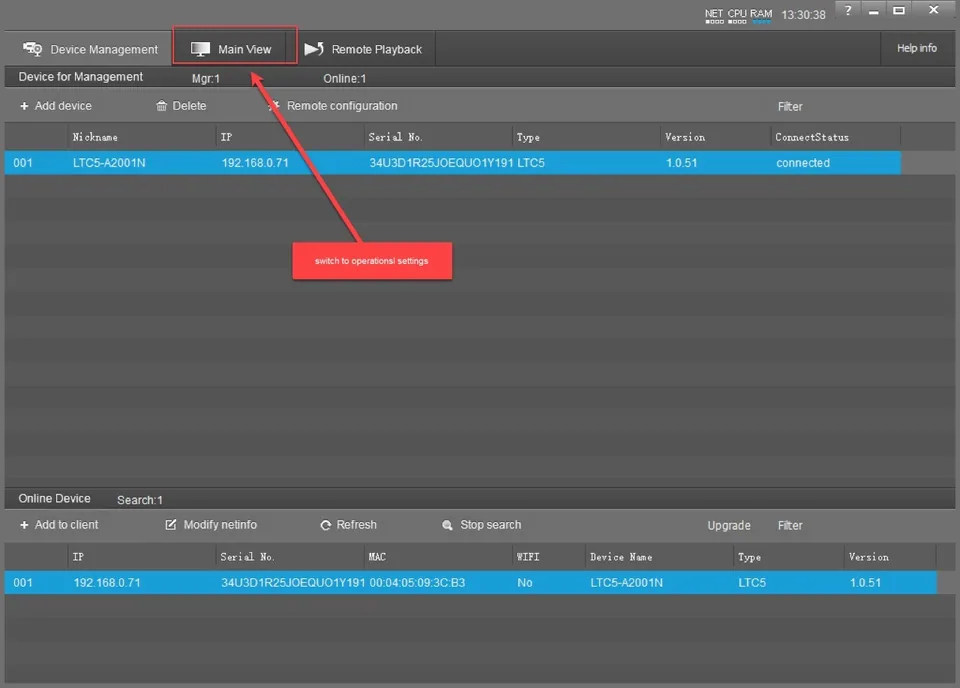
Click Main View to access the camera preview and operational controls.
- In the Device list, double-click the camera to display its video feed.
- Click the button in the bottom-left corner to start or stop AI object tracking.
- Click Settings to configure AI object bounds.